Prevention & Response
PLEASE NOTE: We are not medical professionals, and the information on this page should not be considered medical advice! What we present here is the best information we have at this time based on our research and consultation with others who do have medical training. Use this information at your own risk, and remember that all rope bondage is dangerous and carries the risk of injury. You should research this information for yourself. We also highly recommend First Aid and CPR training for all rope practitioners. In nearly all cases below, if you are medically trained, you will have more informed options that you may choose to pursue beyond the ones listed here. These steps are intended to help those without medical training to provide assistance while also not causing further harm. Finally, if you are injured, our best advice is to seek medical treatment from a qualified facility.
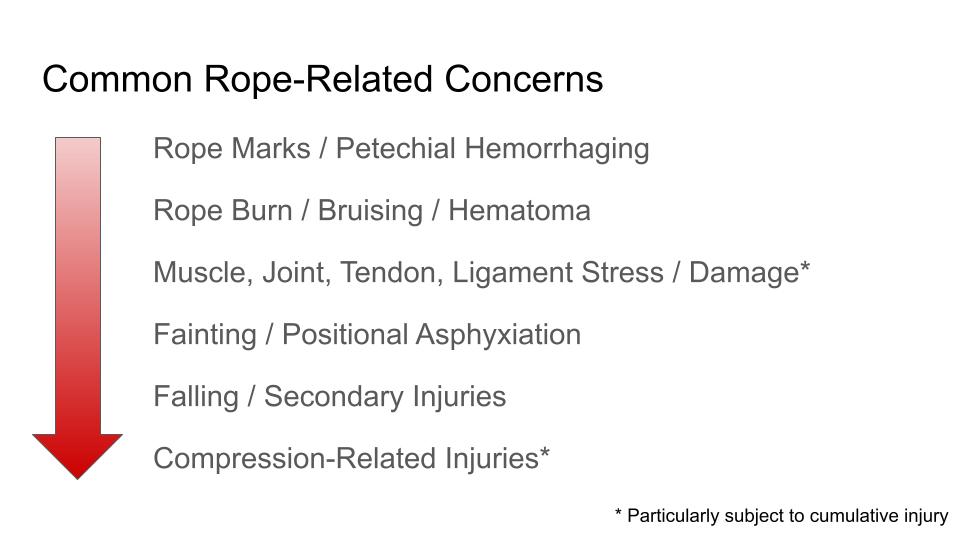
Below are the most common rope-related issues and injuries that we’ve encountered through our work with others. While rope bottoms may be more at risk for most of these injuries, rope tops may also be susceptible. And either way, tops should feel the weight of responsibility when they tie, knowing that they may be part of causing these injuries to others.
Rope Marks / Petechial Hemorrhaging
While not a serious “injury,” you should know before being tied that you will likely have rope marks that can last from an hour or so to over a day. Rope marks tend to be more pronounced and last longer when the rope is loaded (as in partial or full suspension). In addition, petechiae can result from the rope pinching the skin, and those marks can last for a week or more. However, petechiae only tend to occur when the rope is loaded.

example of rope marks; submitted by @serotinal_kinbaku 
example of petechial hemorrhaging; submitted by @alexaachase 
example of petechial hemorrhaging; submitted by The Mascot & Flame Princess


Prevention: Rope marks are usually unavoidable (unless there is very little tension on the ropes), and they don’t tend to last longer than a day if there is no accompanying bruising or petechiae. Petechiae can sometimes be avoided by running a finger under the bands to settle the ropes and remove any small gaps in the bands that might pinch the skin, but some people are more susceptible than others.
Treatment: There’s no real “treatment” other than time … and maybe some moisturizer, witch hazel, or arnica cream.
Related (though uncommon): intense pressure around the neck (sometimes present in rope or sex play, though note that this type of play is extreme edge play) may lead to ruptured vessels in the eyes. This may also be possible during inversion with extreme stress. On its own, this is typically not a major concern and will clear up within a few days. However, see a doctor immediately if there are any accompanying changes in vision.
Rope Burn

If the rope is moved too quickly over skin, it can cause rope burn. Severe rope burn may even break the skin. This can happen to rope tops and bottoms.
Prevention: To help avoid this type of injury, pull the rope slowly when it’s lying against the skin, don’t let the rope get caught in places where the skin folds on itself (elbows, knees, arm against body, etc.), and hold the rope out and away from the skin when possible if moving quickly. Also be careful when moving the body in rope, particularly rope that is tied to something else that may cause the rope to pull and drag across the skin. We see most instances of severe rope burn occur during suspension when the rope shifts dramatically and quickly on the body.
Treatment:
- If the skin is unbroken:
- Apply cool water to help with pain and swelling
- Optional: witch hazel or arnica cream may help with healing if the skin is unbroken
- Optional: over-the-counter pain medication may help alleviate pain
- If blisters form, do not break them; cover with room to breathe
- If the skin is broken:
- Clean the wound with cool, clean water and fragrance-free soap (watch for rope fragments and remove)
- Optional: apply a topical antibiotic ointment (avoid petroleum-based)
- Wrap loosely with gauze with room to breathe
- Optional: over-the-counter pain medication may help alleviate pain
- If blisters form, do not break them; cover with room to breathe
- Repeat daily until healed (within a few days)
- Seek medical attention if:
- The wound is deeper than the top layer of skin
- The wound covers a large area of the body or is in a particularly sensitive area
- The wound has charring or whitish marks around it
- The wound shows signs of infection (redness, swelling, fever, oozing/puss)
- The wound doesn’t show significant signs of healing within a week or seems to be getting worse within a few days
Bruising / Hematoma
Sometimes, rope can cause bruising (often referred to as a “contusion”) or a hematoma, though this is not as common as rope marks and rope burn. While these aren’t pretty to look at and can be moderately painful for a few days, most bruises are typically not a major concern and should fade and heal on their own within a week. However, very large, deep, or painful bruises, or bruises with lumps, may need medical attention.
Prevention: Slow controlled loading of the ropes can help prevent this. Sudden pulls or stops using rope, or allowing the majority of a person’s weight to land on only a few lines of rope, are the most likely way to cause bruising with rope.
Treatment:
- Initial treatment — RICE:
- R = Rest the muscle/limb
- I = Ice can help reduce swelling and relieve pain (10-15 minutes/hour; indirect; can repeat for 24 to 48 hours)
- C = Compression (lightly, with a loosely-wrapped elastic bandage) may help
- E = Elevate the affected area above heart level
- Continued treatment / monitoring:
- Optional: Non-steroidal anti-inflammatory drugs (NSAIDs), such as ibuprofen, may help with pain (ask about adverse reactions); some doctors recommend avoiding over-the-counter pain medications that can increase your risk of bleeding during the first 48 hours (aspirin, ibuprofen, naproxen sodium)
- Optional: after 48 hours, can apply heating pad or warm compress several times per day
- Optional: witch hazel or arnica cream may help with healing
- Seek medical attention if:
- Significant swelling and discoloration or intense pain
- The injury has not faded or is still sensitive after two weeks
- Lump in the bruised area (hematoma) that does not fade quickly
- Change in color or sensation in a limb below the bruise (example: for a bruise on a calf, pay attention to changes in the foot)
- Unusual bleeding (nosebleed, blood in discharge / urine)
- Bruising on the chest or abdomen merits special attention and could point to more serious issues; continue to monitor closely for any changes or adverse effects and seek medical attention immediately if noticed
Muscle, Joint, Tendon, Ligament Stress / Damage
In many forms of rope bondage, the body is moved and contorted in ways that aren’t typical, and this can cause injuries to muscles, tendons, and joints. In addition, certain positions or contorting movements can result in injuries that may or may not manifest right away. For example, a tie that twists the body might quickly result in back and knee pain, while another tie might feel fine during the experience, but afterwards, result in back pain. In addition, injuries of this type can be cumulative and get worse through repeated activities. Be mindful of these concerns as you tie or are being tied.
Prevention: For bottoms, the best prevention is to seek out information on active bottoming to learn how to move effectively in rope and to adequately prepare your body for the type of rope you want to enjoy. For tops, the best prevention is to make slow and controlled movements. Don’t jerk or apply force quickly.
Many injuries of this type, particularly as they relate to knees, shoulders and lower back, are cumulative in nature and do not manifest right away. Through careful monitoring of the body, slow and controlled movements in rope, and proper self-care (stretching, massage, corrective exercises), these types of injuries may be minimized. However, the more frequent and intense the rope you practice, the more likely you are to suffer these kinds of injuries over time.
Given this fact, we urge rope tops to expand their tying options over time to allow rope with a given partner to continue in a more sustainable way by changing the positioning and type of tie that is typically used. Likewise, it’s important for rope bottoms to communicate problematic areas and positions and to ask for what they need in rope.
We also find that these are the types of injuries that rope tops are also likely to experience. Often this comes from the constant kneeling, lifting, twisting, and other similar movements involved in tying someone up, moving them around, or lifting them into the air. The same cautions, preparations, and treatments apply to tops as to bottoms.
Treatment: In most cases, RICE and careful monitoring. If the problem persists, particularly if you suspect it’s the result of cumulative damage, temporarily stop rope practice until you can see a doctor; likely prepare for some form of physical therapy.
- Call 911 if: there’s intense pain, significant swelling, the limb/muscle isn’t working properly, or there was an unusual “popping” sound with persistent pain
- Initial treatment:
- R = Rest the muscle/limb
- I = Ice can help reduce swelling and relieve pain (10-15 minutes/hour; indirect; can repeat for 24 to 48 hours)
- C = Compression (lightly, with a loosely-wrapped elastic bandage) may help and also stabilize/support the area
- E = Elevate the affected area above heart level
- Provide water to get the person hydrated, sugary snacks if needed to restore blood sugar levels, and snacks with carbohydrates and/or protein after to maintain blood sugar levels [Intense rope and other types of intense physical exertion or stress raises cortisol levels, which increases blood sugar to fuel the “fight or flight” response. This excess use of blood glucose during the interaction can lead to a “sugar crash” after the interaction. This is why providing fruit juice or sugary snacks can be helpful immediately after. In addition, for intense or prolonged sessions, following this with carbohydrates and/or proteins helps the body to better maintain appropriate blood sugar levels.]
- Optional: Non-steroidal anti-inflammatory drugs (NSAIDs), such as ibuprofen, may help with pain (ask about adverse reactions); some doctors recommend avoiding over-the-counter pain medications that can increase your risk of bleeding during the first 48 hours (aspirin, ibuprofen, naproxen sodium)
- Note that blood sugar levels should be restored and stable and the person should be well-recovered before driving.
- Continued treatment / monitoring:
- Return to activity slowly as you heal (this can take multiple weeks or months depending on severity and type of injury)
- Exercises to stretch and strengthen the surrounding area are helpful
- Avoid repeating the activity that caused the initial injury until fully healed
- Consider finding different ways to achieve the activity
- Consider physical therapy
- Seek medical attention if:
- Pain persists more than a few days
- The joint can’t bear weight
- The limb is cool or pale
- There is tingling and numbness
Fainting and Positional Asphyxiation
Fainting is the most common rope-related concern that we have encountered (omitting rope marks / rope burn), so we feel it’s important to be familiar with causes and proper responses before you go too far down the rope bondage path. Usually, fainting is not a cause for major alarm or concern and can be recovered from relatively quickly. However, fainting can often cause secondary injuries in the process of falling, and fainting can sometimes be a symptom of greater concerns.
We’d also like to note that we’ve seen fainting in bottoms of all types, sizes, and levels of fitness, so this has nothing to do with being a “tough” bottom … everyone can be susceptible in the right conditions.
The most common causes of fainting in rope bondage include:
- Dehydration. Dehydration can contribute to lower blow pressure, which is a contributing factor in fainting. Proper hydration will maintain blood volume and greatly reduce fainting due to vasovagal syncope. Be sure to be properly hydrated leading up to any rope interactions. Ideally, this means maintaining good hydration regularly, or at least a day or two before practicing rope. Note that drinking a lot of water right before doing rope will not do enough to combat dehydration and will likely only result in the urgent need to pee … usually as soon as the tying begins!
- Low blood sugar. Not eating enough in an appropriate period before practicing rope bondage can result in low blood sugar, which can contribute to fainting and other adverse reactions. People with diabetes may be more susceptible to this cause.
- Remaining in one position for too long. While the warning “don’t lock your knees” is well-intentioned, it doesn’t hold up to medical scrutiny. Locking your knees allows you to stand still for a long period of time, but it’s not the locked knees that causes the reduced supply of blood to the brain that results in fainting … it’s the standing still for a long period of time followed by sudden movement, locked knees or not. Movement — particularly movement initiated by the bottom — expands and contracts muscles, and it’s this action that returns blood back to the heart to be reoxygenated and pumped back out to the body. So, the lesson here is to beware of static positions for a long period of time–particularly positions in which the bottom isn’t able to work their muscles–followed by sudden movement. (This can include something as simple as kneeling while a tie is applied to the body for a long period of time, and then quickly standing. Be attentive, as that alone can cause some people to faint.)
- Sudden movement after a period of being motionless can also contribute to fainting, particularly if that movement involves shifting the position of the head. This is particularly true when someone is in a strenuous position and then experiences a sudden change to that position.
- Restricted blood flow. Rope bondage, along with the position in which the rope bottom is bound, can result in restricted blood circulation, which may also result in a slightly lower supply of blood to the brain. People with anemia are particularly susceptible to this cause.
- Restricted breathing / positional asphyxiation. Some forms of bondage can also restrict breathing. This could be due to the rope being wrapped too tightly across the belly or chest, preventing the diaphragm from fully expanding to take in breath. It could also be from the position the bottom is in, particularly in torsion, extreme flexion or hyperextension, or face-down positions. Some examples of difficult positions: “ebi” ties (where the person is folded in on themself), “hogties” (face down, usually with rope around the chest, arms and legs pulled back in flexion), ties the pull the arms overhead (“bunny” ties or “teppou” ties), or ties that twist the body. We have seen fainting occur often in torsion positions (where the body is twisted in some way, again causing restricted breathing). And while it should be obvious, rope around the neck is extremely dangerous, as it can restrict breathing and circulation, compress nerves, and result in spinal dislocation.
- Hyperventilation. Conversely, hyperventilation (lots of quick, shallow breaths) can also contribute to fainting and is usually the result of stress. This can also be caused by rope that is too tight and a nervous response to that constriction.
- Extreme heat. Physical exertion in extreme heat can cause peripheral vessel dilation, which means less blood makes it to the brain. This is particularly true in high humidity. Be careful about overheating and watch for extreme sweating (usually a symptom that the sweat isn’t able to evaporate and cool the body), and realize that this can happen even if the temperature of the environment isn’t extremely high.
Fainting while in ropes poses particular risks if the rope is secured to a static object that may add sudden force to the ropes when the bottom faints. And, of course, if there is not supporting rope when the bottom faints and they are not otherwise supported, they may also suffer injury from the fall (see below).
Prevention: Alone or in combination, any of these issues can result in causing the rope bottom to faint, either while in the rope or just after having the rope removed. Be attentive to these concerns, look for early warning signs, and be prepared to respond quickly and calmly.
Early warning signs include:
- skin (particularly the face) becoming very pale (or sometimes blue or red)
- excessive sweating or the skin becoming clammy
- feeling lightheaded, weak, or dizzy
- sudden headache and/or ringing in the ear
- tightness in the chest
- tingling around fingertips and lips
- shortness of breath
- feeling nauseous or, in extreme cases, actual nausea or incontinence
Treatment:
- If they are feeling faint but have not yet fainted, help them safely to the ground and remove any restricting rope:
- If the bottom is standing, move behind them, put your arms under their armpits, and step back to help them to a seated position
- Remove any rope that could be restricting breathing or blood flow
- For most people, one of these three positions will be most helpful: lying down on their back with knees bent or legs slightly elevated will be most helpful; recovery position (on the side with support at the neck), or seated with their arms on their raised knees and their head resting on or between their knees
- Note that people will often twitch or jerk as they recover from a faint. This is normal and is typically not the same as a seizure. That said, someone with a history of seizures are particularly susceptible after fainting.
- Normal twitch and jerk recovery vs. seizure: longer than 30-45 seconds; blue lips; twitching/jerking is rhythmic; may also include loss of bowel or bladder
- Protocol for responding to seizure: call 911; move the person into recovery position; clear the surrounding area to remove any hazards; do not put anything in the mouth
- Offer water and find ways to cool them if they feel hot
- Offer fruit juice (or water and sugar) or sugary snacks if needed to restore blood sugar levels, and snacks with carbohydrates and/or protein after to maintain blood sugar levels
Fainting without a fall or other trauma – if you are certain the person did not suffer a fall or other trauma, follow these steps:
- If they do faint without a fall
- Move them safely to the ground if they are not already and help them to lie down. (NOTE: There is some controversy in the medical field about whether to first put someone on their back with knees bent or slightly elevated or, instead, to put them on their side into the recovery position. Putting them on their back first allows you to start CPR immediately if they are not breathing, but that seems to be the major benefit. If they are breathing, putting them into recovery position is probably best.)
- Check for responsiveness (loudly asking “Are you OK?” or gentle taps to the shoulder; do not shake, slap, etc.)
- Loosen any rope or tight clothing and check for breathing (see below)
- In most cases the person will begin to recover within one minute
- Stay with the person until they are fully recovered
- Encourage the person to remain lying down for 15 minutes
- After, offer fruit juice or sugary snacks if needed to restore blood sugar levels, and snacks with carbohydrates and/or protein after to maintain blood sugar levels
- Encourage the person to avoid any further strenuous activity
- Encourage the person to consult with their doctor, particularly if there was no clear cause for the fainting to occur or for repeated instances of fainting
- If they are not breathing
- Call 911 immediately and follow the directions of the operator
- Begin CPR if you are trained
- If they remain unresponsive and an Automatic External Defibrillator (AED) is available, follow the directions on the unit
- If they are breathing but remain unresponsive for more than one minute
- Call 911 immediately and follow the directions of the operator
- Move them into recovery position if they are not already and continue to monitor for breathing and vomiting
If they suffered a fall or other trauma when they fainted, or if you are not sure whether or not they suffered a fall or trauma, the best advice is to not move them (unless absolutely necessary to prevent further harm, see below) and to call 911. Read on to the “Falling” section below for more details.

We highly recommend also reviewing this article: “Blackout: What to do when someone faints“
Falling
When we talk about falls in rope, most people probably think about suspension. And while a fall from suspension is probably the most serious type of fall, the more common type is a fall that results from a bottom who has their hands tied but is otherwise free to move about.
We’ve seen many bottoms tied with their hands behind their back walking (or sometimes running) around the space. We’ve seen bottoms with one leg tied hopping about on the other. We’ve seen partially-bound bottoms trip over mats, furniture, or even the rope. And when your arms can’t move to catch yourself, you often end up on your face.
And of course, tops can fall, too! Tripping hazards about in most play spaces — from mats to rope to rope bags — and anyone can trip, fall, and need attention.
Prevention: So, one of the easiest ways to prevent falls is to not wander about with your arms or legs tied up, and to be extra attentive to surroundings any time they are! The second best prevention is for others in the space to be attentive to bottoms with their arms or legs tied, particularly if they attempt to move about in that state, and be ready to intervene. And everyone should be aware of tripping hazards for all involved!
Other potential preventions include:
- Keeping the tying area clear of tripping hazards
- Being aware of sudden changes in position. In particular, kneeling while being tied can result in the legs and feeling falling to sleep. Standing someone up quickly after that could result in a fall as a result. So, when changing positions after a period of remaining static, maintain support until the person is stable.
- Using controlled and supported lifting and lowering , either with or without up-lines
- Making sure any up-lines are secured to a stable anchor point that will not give way
- Related, but important: making sure that any up-lines will not cause other injuries should the bottom fall or faint. For example, if a bottom is standing with their arms tied in strappado, with the arms attached to an up-line but no other support lines, and that bottom falls or faints, they risk having their shoulders injured.
Treatment:
For a minor fall:
- Encourage the person to remain still for a moment and help them to ascertain if there are any injuries
- If trauma to head, neck, or spine is suspected, do not move them and see “For a serious fall” below
- Check for bleeding, bruising, or anything broken
- Help them move slowly into a sitting position and check for any signs of pain or dizziness
- If they still seem fine, help them slowly to stand and check for signs of pain or dizziness
For a serious fall:
- Call 911
- Check for responsiveness and breathing
- If they are not breathing, begin CPR
- If they are breathing, do not to move them (unless absolutely necessary to prevent further harm, see below)
- Consider providing cervical-spine (“c-spine”) stabilization (see this video), particularly if there is any risk of head, neck, or spine injury. This prevents further damage by stabilizing the neck and head.
- Try to keep the person from moving as you continue to offer reassurance that help is on its way and to assess their awareness.
Defining a serious fall:
- A fall greater than 3 feet
- A fall onto the head
- A fall with any symptoms of spinal injury (immediate onset of neck pain, numbness, paralysis, incontinence, or severe pain)
- A fall with any loss of consciousness
Exceptions to “do not move”:
- You should not move the person unless the position in which they fell is impairing breathing and/or circulation or causing other serious harm (for example, you need to apply pressure to stop extensive bleeding)
- You do not need to cut off the rope unless the rope is impairing breathing and/or circulation or causing other serious harm, for example: a bottom still partially hanging from a limb. (Medical professionals who respond will cut other rope as needed.)
We highly recommend also reading this article: “Rigger’s nightmare — whatcha gonna do? Handling falls from suspension“
Compression-Related Injuries
The most common compression-related issues are circulation loss and nerve damage.
In much rarer instances, sudden and/or forceful compression of lymph nodes (particularly around the armpit and upper chest) can lead to lymphedema. (This is extremely rare, would require significant force or extremely bad luck, and should only be diagnosed and addressed by a medical professional.)
Generally speaking, circulation loss due to rope bondage isn’t a major concern, nor is the purple discoloration that typically accompanies it. In most cases, a limb can be without circulation for the length of a typical rope interaction (30 minutes or so) without any issues (unless the person has a pre-existing condition related to blood circulation; see here for more information). However, the larger concern with reduced circulation is that, when a limb goes numb, it can mask other important warning signs, the most common of which is nerve compression and damage.
Nerve compression damage is the most pervasive serious injury in rope bondage. It is well worth the time and effort to learn about the nerves most susceptible in rope bondage, for tops to learn strategies for tying to help prevent damage to those nerves, and for bottoms to cultivate techniques and awareness to better recognize symptoms of nerve compression as soon as possible.
Prevention: There are a number of places on the body where nerves are vulnerable to compression injuries, particularly in the arm-pit, around the outside of the upper-arm and elbow, around the wrist, in the inner thigh and crease of the waist/groin area, and along the outside of the knee and lower leg. Unfortunately, these are also locations where rope is often placed for many common ties. Therefore, it’s important to pay careful attention to these areas during any bondage session and monitor sensation and mobility carefully. Damage to nerves can result in anything from sensation loss to temporary (and sometimes even permanent) control of a hand or foot. For example, a rope bottom suffering from “wrist drop” may not be able to type, open a door, or perform other common tasks for weeks or months at a time.
We go into much more detail about prevention, early-warning signs, self-tests, and other details in the next section: Nerves & Circulation
Treatment:
- Because there are few studies that are directly relevant to the type of nerve injuries that occur in rope bondage, and given the always-evolving nature of medical practice, it can be difficult to recommend things that any individual “should always” do in these cases. (This is another reason prevention is the best approach if at all possible!) The best current advice is a short list of Dos and Don’ts:
- Do not massage, stretch, or compress the injured area
- Do consider resting the area initially, but begin gently mobilizing it within 24-48 hours
- Do avoid further injury by protecting the area as appropriate and remembering that nerve damage can occur in locations other than the area displaying symptoms
- You may also want to use the acronym “SWEAR” to help you remember options for responding to this type of injury, provided you also remember the caveats!
- S = Stop – stop the activity immediately at the first signs of nerve compression and remove all rope or other forms of constriction or compression (this is always true)
- W = Water – drinking plenty of water and staying well-hydrated can help with inflammation; applying cool water or ice may help reduce inflammation and relieve pain (used sparingly for 10 minutes/hour; indirect) but please note that not all medical professionals recommend this and some studies suggest this may delay healing
- E = Elevate – optionally, moderately elevating the affected area for a short period may help
- A = Anti-Inflammatory – non-steroidal, anti-inflammatory medication (NSAIDs) –- such as ibuprofen (Advil) and naproxen (Aleve) -– are often recommended because they have pain relieving and anti-inflammatory properties (maintain consistent dosage for a few days to be effective); however, please note that some studies suggest they may delay the healing process
- R = Rest the affected area; avoid massaging or stretching to “fix it” (you may also consider splinting the affected area to avoid further injury); however, within 24-48 hours, gentle mobilization is recommended
- No matter your approach, if symptoms do not lessen in two to three days -– or if there is intense pain –- seek professional medical advice!
Special thanks to RopeJester, Shayblondie, Hedwig, Topologist, MissDoctor, IPCookieMonster, Esinem, St3amPunk, and the many others who provided resources and suggestions.
Please continue to the next topic “Nerves & Circulation” for additional information and important ways to monitor and check for these types of injuries.